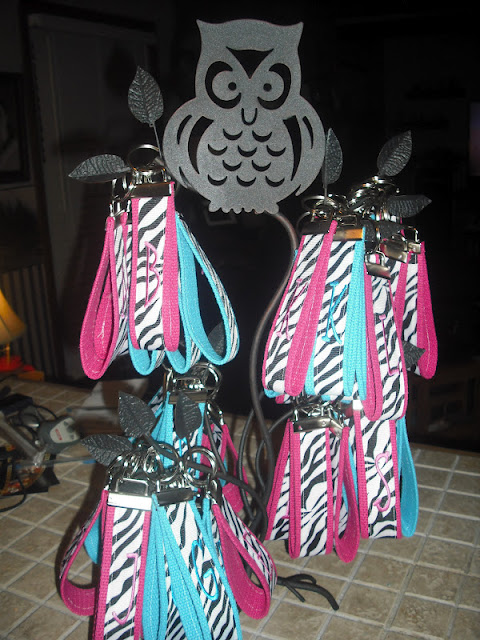
I embroidered a single letter for each guest of the wedding shower on a ribbon, using a 4x4 hoop. I was able to sew 4 at a time.
It took a little playing around but once I figured out positioning of the ribbon it was easy. To do this I stitched on plain fabric, made my marks and then moved the letter in the software until I got it right. I marked my center and then a small mark on the outer ribbon position.
I hoop only the cut away stabilizer and then use spray adhesive.
I cut a length of ribbon 10". I like the length but the next time I may try 12" and see how that works.
I place the first ribbon on the center line, then on the outside marking.
I then placed the next to ribbons spaced evenly.
Until I felt comfortable on how things would stitch and that they would line up correctly, I stitched one letter at a time.
My machine, the Singer Futura, XL 400 that I LOVE!
Once stitching is done, I cut the stabilizer away.
I then cut a piece of webbing the same length as the ribbon.
I then ironed on 2 sided adhesive that came in a roll to the ribbon.
Peel off the paper backing.
Center the ribbon in the middle of the webbing and iron on. Once it was ironed on I stitched down both sides with a straight stitch on my sewing machine.
Now you are ready to add the hardware. Bend the webbing in half and place the metal part of the key fob on the top. I have a hand tool called a hand seamer which worked perfectly. Squeeze hard and the hardware is attached. Add the key ring.
That's all there is to it
Here's all of them that I made for my nieces wedding shower. These will be favors for the shower.
Supply sources:
Embroidery font, Pea Pod, 2": http://www.8clawsandapaw.com/
Webbing and hardware, 1 1/4": http://mamashecrazy.com/
Hand seamer: Tool I purchased from a local tool store, Harbor Frieght. It was only about $8 and well worth it.
Ribbon 7/8": Hobby Lobby


